Saturday 28 December 2013

Winter repotting observations


This is my first beech. It is pioneering the techniques that I will use on the other bigger ones in years to come.

http://englishbonsai.blogspot.co.uk/2012/04/first-copper-beech.html

In 2012 it was the smallest and least interesting beech - and now it is almost the largest and very interesting - at ground level the trunk is now 5-6 cm diameter. There is a good taper in the trunk and some gentle movement. I have never seen a wild beech tree that looked like a deep fried pigs tail - so the gentle movement is just right.

The difference in growth rate and quality of foliage may be partly due that the big pots being on tap water and cheap bulk fertilser whereas this one has been on rainwater and Canna Bio Vega.

Santa brought me some nice sundries - more soil stuff and some training pots - so that the trees that were in training could be re-potted into bigger and better pots.


This picture as I pulled it out of the pot today (28 Dec) seems to show that the root system is quite busy underground in mid winter. Well it has been a very mild winter so far but I'm still surprised.

This soil mix has worked very well and the tree has really done very well in it. In retrospect adding the bark to the otherwise inorganic growing medium was a good idea.

Beech trees in their native forest habitat are dependant on mycorrhizal fungus for their nutrition. Their metabolism seems to be set up that way - so I am doing it in miniature in pots. This beech has had several flushes of growth this year and needed a lot of cutting back - especially the apex - the other beech trees just give me a single flush.


This is the growth medium I am using this time. 3 parts of biosorb + 3 parts supalite + 2 parts bark - none of which were filtered or graded. The biosorb particles are a bit coarse so the smaller supalite particles bring down the average. As you can see in a later image the roots have done very well in this fine average particle size medium.

And the pink soil is ugly. In retrospect the bark addition is the important bit as it gives the natural fungi something organic to cling to. And as I have been exclusively using organic fertilisers for the last few years it is vital to have all the soil micro organisms present to get the nutrition to the plant.


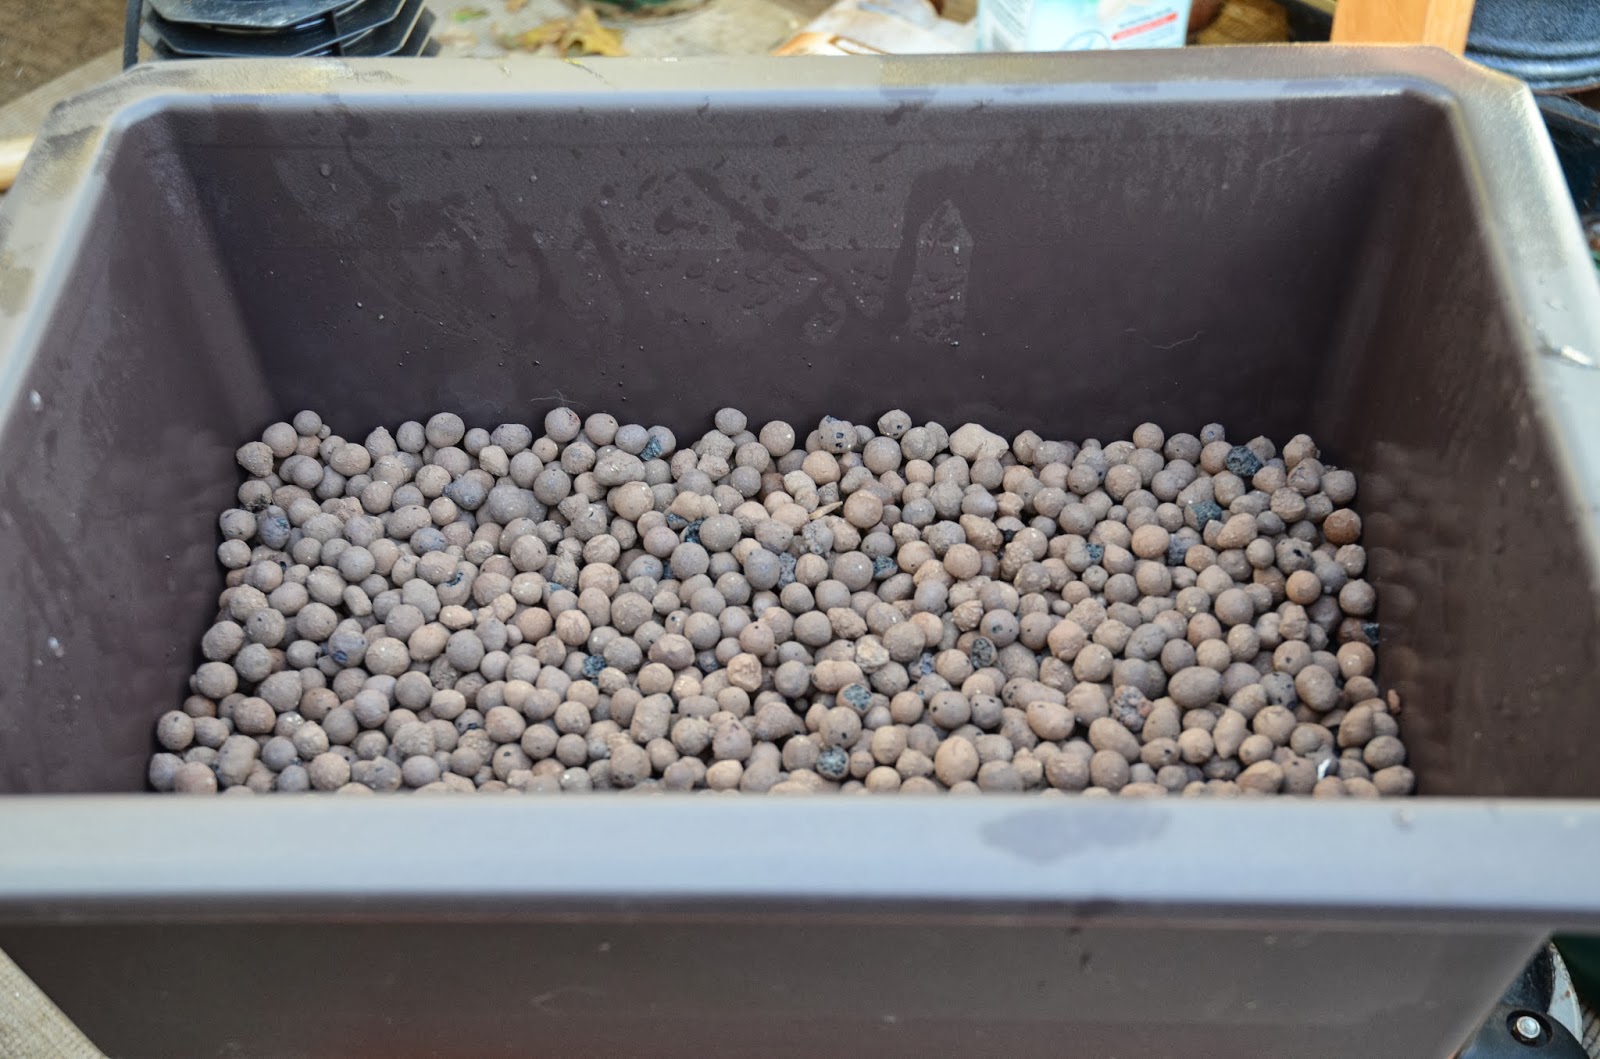
I am lining all my pots with these coarse clay pebbles as a drainage layer. These big plastic training pots are 32x45x16 cm. I fill them to within about 1 inch of the top to make them nice and easy to water.


I was very happy when I saw these roots. Lots of fine roots. All I did was work the edges of the pot loose and trim some thick roots out. There wasn't much to do as I had a pot full of lovely fine roots.


Here it is back out on the bench. It's going to spend another 2 years in that pot.

While I was out there I decided to re-pot another of the trees. It's a field maple that I collected several years ago. I had been ignoring it as they seem to have a strange growth habit - and I was trying to understand it - there were odd bursts of growth and then long periods of dormancy. It was potted in pure biosorb.


It was in an old ceramic pot that was slowly disintegrating in the winters here. The most important thing here is what is living in the bottom of the pot. It is teaming with fungus gnat larvae - alive and wriggling in mid winter and weakening the tree for the spring. I am certain that this is the reason for the odd growth habit - it was under constant attack from pests in the soil. It also wanted more food - and it had quite a good year because I put it on the same feeding rotation as the big pine trees.


This is the field maple with all the thick roots removed and trimmed back to the coarse drainage layer. Nothing to complain about here. I'm hoping that next year I will do a lot better as the feeding will be right and the pests will be removed.


Not a great image - and it's over potted - but I'm hoping for 3 years in that pot and then a decision on its future. It will be pest free and very well fed. I'm thinking that the trunk will at least double in diameter over that time. As I hadn't cut it back much its branch structure is full of strange tapers and odd shapes.

The important observations from this session of re-potting are.

Natives grow very well in a finer particle inorganic mix.
Adding an organic particle to the substrate is important - especially with organic fertilisers.
Pest prevention in the pot is essential - fungus gnats are a real problem and difficult to cure.
Trees in a sterile substrate need a surprising amount of feeding to thrive.
Trees in training must be groomed constantly.


Saturday 7 December 2013

Big pot growing experiment

In early April I planted a few trees into giant pots, as an alternative to field growing as I don't have my own garden to dig up and experiment in. This is the result after the first year. 


I have been putting wire around the trunks as a Dendrometer so that I could have a good idea of the growth. Next year when they are settled I will be more scientific in my observations and keep more regular measurements.

It seems that the strong growth of wood begins in early April and ends in early September - before and after that there is still a lot of vegetative growth. This is outdoors and will be different under glass - early budding maples in cold shelters will have their major expansion earlier in the year.

Next year I will be sure to regularly water and fertilise during this critical period of growth (March to May). On established bonsai this is the time to go easy on the feeding to avoid big leaves and fat shoots.

This is an early August picture of the base of the oak tree. There is some good expansion already.


It already has a nice taper and a little movement in the trunk so it's not like a lamp post. I don't see many oaks with much movement in the trunk growing in the fields around home so I see no point in an oak bonsai that looks likes a pig's tail.

This picture was taken in early December after the leaves had dropped. I used a match box for scale (which is 5.5cm wide). There seems to have been another bit of growth since the previous picture. This is no surprise as it had been very active above ground.


The beech expansion was less impressive but still good. Its already quite a lot bigger than the oak - I think its a year older.


The beech does seem to want a little time to settle into its new home before it really gets going so I hope for a strong showing next year. My previously repotted beech trees have shown a pattern of growing a lot better in their second year. I suspect that this is due to the fact that the beech root system begins its growing after the budding - so potentially the new growth is a bit starved in its first year.

Given the behaviour of the root systems it is my opinion the trees must be potted and settled by mid March.

On both of these trees (especially the oak) I have been constantly pruning to keep their apical dominance at bay. I am specifically encouraging the lower side branches on both.

So far it all seems to be working.

Wednesday 20 November 2013

Oak Rescue


Here is my first oak at the beginning of the year - 6 or so years after I found it coming up in my vegetable patch. It was starting to look quite pleasing to my eye. A little skinny still but a few more years will fix that. It's the first oak because there are 3 more that have come after it that are gaining weight in the field and big pots and will be a lot better at this age.

The evening after this picture was taken we had an unpredicted but very heavy frost. I now realise that the skinny pot had also made the roots very vulnerable to the frost. The foliage was quite badly damaged - but not as much as a maple which had all its leaves killed.

I took the tree back under glass until the frosts were gone. It then went into a sheltered location outside. It had lost its vigour - no new growth happened - but there were still many good leaves. At this stage I was already applying foliar fertilisers and Rhizotonic.


My cat is peculiar little beast. She came running into my study yelling loudly for me to come and look. She then ran straight out and showed my the poor tree lying on the paving. Quite how it was wrenched out of its pot and thrown several feet I don't know.

I could see that there were very few live roots left - burned away by the frost I think. I got a little hope from a few new white roots visible on the edge of the root ball.


Somehow I just couldn't keep the tree upright. it got walked into and collided with for no good reason several times - no matter how far out of the way it was. This was making me very angry and I decided that action was needed if  it was going to be saved - and that I wanted to save it. I ordered a new pot for it. 

The tree needed to be in an environment that was going to encourage it to grow roots and recover. 


The drainage layer is hydroponic clay pebbles - with the usual mesh over the holes. Then I placed a layer of coconut fibre. As an experiment I also bought some mycorrhiza specific to oaks which I sprinkled on the layer where the roots were going to sit. This would put it in direct contact with the roots.


I have been using a lot of coconut fibre (coir) for vegetables and some other growing projects - my chilli plants this year have been the most productive ever in this growing medium and the results are very good for other species. Other growers also report that it is similar to sphagnum moss in its ability to stimulate roots.

In my limited experience so far the organic growing media tends to attract fungus gnats in great numbers. I am in the process of trying out several cures. 


The constant mist technique is used commercially for rooting cuttings. I tried to follow this methodology and mist the foliage as often as possible - aiming to keep it constantly moist. I also used some foliar feed and applied Canna Rhizotonic to the foliar feed.

I would advise you not to use fish emulsion as foliar fertiliser as during the summer it will attracted a great number of flies.

I also used Canna nutrients specific to the type of coco soil I was using and some additional Canna Rhizotonic to additionally stimulate the roots and relieve stress.


It took a long time but I have got new growth again. I hope this has put enough energy in so that it survives the winter.

I shall be more careful next year.

Sunday 29 September 2013

Pine Work


I spent some time this weekend doing some trimming and wiring on one of my pines (the little one). I think this one is onto its final branch selection now - and at last I have found the right front for it - which I cunningly neglected to photograph. I have left some of the lower branches very foliage-heavy as I want some extra vigour there because they are too skinny at the moment.

Sadly I have run out of wire and I have had to order some more to finish the job. I am now doing a full wire of all the branches from the trunk to the foliage. Its been an interesting experience with this one as I'm trying to put some extra movement into the straight inner branches while keeping it real and not resorting to cheap spiral tricks to tighten it up.


Here it is back in 2009 when I acquired it. It's come a long way in 4 years. 


I now have some really nice deltas of foliage forming. Some more to come - but these are looking quite nice already. Each new generation of branching will now be shorter - and hopefully I have matched them correctly to the needle size.


I took off all the spare branches once I was decided on the final ones - and removed any undesirable internal branching. I have also removed a lot of the needles on the undersides of the branches as they often turn to buds and make a nuisance of themselves.

A lot more work to do on this one - but an enjoyable way to spend a sunny Sunday afternoon.


Sunday 22 September 2013

Boring

This image is quite boring. Nice bokeh on the background maybe. Boring to someone who does not grow pines. But to me this is very interesting at the end of a growing season - I see this change in needle length - also the 1 year old needles are being dropped already. There is also a nice big bud formed for next years growth.

As you can see the old growth is very leggy. Very long thin twigs with small needles at the ends. This is a tree that is really struggling to keep going. Some people like this in a bonsai - the wizened old tree clinging to life - I don't.


Here is one of the growth tips. My Scots pines usually hold their old needles a bit longer than this - but this new tree seems to have decided that all the old ones were rubbish and that the new ones were much more effective. Also important is that there are multiple buds at the junction where this years growth began. In the past the area where the old needles have dropped has been especially good for developing new buds.


There are new buds forming a long way back on these skinny twigs - some even further back than in this image. I estimate some to be on areas which haven't had needles for at least 5 years now. I hope to be able to cut back to these next year sometime. The timing of the cut back is critical with pines - or you can get stuck in an 18 month wait for buds - there is only 1 time of the year that you can cut Scots pine and get good buds in that year - around the time I pinch candles I do any heavier cutting.


I have been paying attention to the feeding and soil care. This year I have tried a new product on the pines - the usual Canna products - but I am using the organic range now. I have also been using the biobizz fishmix to give the pine soil microbes an extra hit - instead of the fish emulsion - as it is easier for me to get. I have also used some Cannazym this year which does help the soil structure - I noticed a difference in drainage on this pine quite quickly - allowing me to deliver nutrients to the roots more effectively.

This was the starting point for the new pine I bought in May this year. So far all I did was remove the dead twigs and get it comfortable and well fed. Almost every needle in this picture is gone and replaced with new needles that are 3 times the length - it is completely different already.

I would also love to get it out of the mud its living in - so I will get a new pot and plenty of soil for February if I feel its ready for the big transition. Past experience tells me that if I do it in February and keep lots of roots that it will barely notice the re-potting. I have seen a local wholesale dealer with the right training pot - so how do I get someone in retail to sell me one? Something to keep me busy over the next few weeks.


Here it is at the end of year 1 from the same angle. If I had bought it a month earlier there would have been twice as much foliage - another lesson learnt - the growing season starts in the beginning of April. Still - it has had a good summer with plenty of food and nutrition so I am hoping that it has enough energy in reserve to do a complete bare root and transplant over the winter.


Can you grow bonsai without being a good gardener ? Boring perhaps - but I believe that the horticulture is vital to successful bonsai.


Sunday 11 August 2013

Bonsai World 2013

The bonsai world 2013 was on this weekend - so took a little drive out on Sunday to go and have a look around. I was really keen to get there as there were going to be some nice things to see in the sales area - and for once I'm not broke and can afford to shop modestly.

The scene as you entered the main hall.


Some shots of the displays. In my excitement to get in I hadn’t adjust my camera so I ended up with a lot of blurry pictures. There were a lot of trees on display and the standard was very good.


And then the sales area. This was very well represented with many of my favourite vendors and artists. All consumables , tools and sundries were available in abundance. There was a decent selection of material available to cater for all tastes.


I picked up a lovely little beech from Kaizen. I’ve spent a bit of time making it a sunny spot on my benches. Now I will spend a few weeks getting to know it first as its a complex tree.


Bumped into some old people and met some new ones. 

Great show.

Tuesday 16 July 2013

Summer Lammas growth

Ive been enjoying a few more days away from work - a well timed gap between projects as I am able to water more often during this spell of hot weather we are having. The weather seems to have kicked off an unusual spurt of growth in some species - specifically the Beeches and Oaks.

I have written before about the Lammas growth - but this year it is very pronounced. I’m guessing that the nice weather has helped the trees to achieved their energy targets for the next winter and they have surplus so they spend it on new growth.

These Lammas leaves in the second flush seem to have come out very quickly and aren’t as nicely formed as the spring leaves. The Beech leaves are a strange colour and the Oak leaves can be slightly deformed having fewer lobes and unusual veins in the leaves.

http://en.wikipedia.org/wiki/Lammas_growth


My small first generation Beech which I potted for fun is coming along really nicely. It is by far the most vigorous of the current generation of Beeches I have. Almost every branch tip is giving growth. I’m nibbling away at the apex buds to keep its apical dominance at bay. These seems to be leading to the lower branches getting some growth as well.


On larger pot grown beeches I’ve nibbled back everything on the crowns to keep them in check. They will grow very thick branches up top if allowed - which leads to an ugly knob forming and no taper. The plan is to allow unrestricted growth on the side branches - especially the lower ones - to allow a good taper for form. Wild Beeches don’t have a great deal of taper but it will look nice - and nice even side branches are easy on the eyes.


In theory I am interrupting the apical mechanism by nibbling off these apex shoots which generate the Auxins hormone which is inhibiting the lower buds from growing - which should give me good sideways growth.


The Oaks are also doing the Lamas thing. I’ve allowed one of the Oaks to grow unchecked and its growing at a massive rate - this one is due for some strategic pruning soon. For taper I am also trying to keep the top end of the oaks in check and get the side branches working.

This Oak wanted nothing to do with hormones and simultaneously elongated everything.
 

These are my first generation of field / large container grown trees. They contain many mistakes and I see them purely as a learning exercise. Useful for acquiring technique - something large and cheap to try stuff out on. I don't expect and good bonsai material out of these - although the little beach is looking nice. 

I planted what I would call second generation trees at the beginning of this year. I’ve allowed them to establish roots and will do some early wiring to the trunks to get something interesting happening there - none of that hyper contorted leaping dragon nonsense - just a bit of interest.


As usual the cat has been overseeing matters.  


Sunday 7 July 2013

Pine musings

With summer arriving for a few days in southern England I have been paying close attention to my watering and fertilising - watering sometimes 3 times on the very hot days. I have been looking at the trees a lot but not doing much to them. The two large pines are interesting to watch as they are next to each other on the benches and on the same watering and food regime and yet the larger one is about 6 weeks behind in its growth cycle.


Today I noticed that the late winter wiring on some inner branches had already bitten in very severely and needed to be taken off before it was lost under the new growth. 


I had also nibbled off all the long candles a while ago and the shorter ones have come out nicely - so they are pleasingly balanced for growth. They are now all evenly cut back to a minimum of maybe 12 pairs of needles and longer where needed. So both of the larger pines are now trimmed up and without wire. I will have a think about when I will apply the wire again. Certainly not soon as they are gaining weight so quickly I would need to redo it every few weeks. 


Quite a lot of material was removed from the larger pine and a fine trimming of the smaller one was done. I won't cut again this year as I want the buds to form for next years growth. I may remove some buds. Last year I made the mistake of cutting back some branches in winter and they didn’t grow at all this year.


The larger pine is now cut for the summer and looking quite nice. Needs wire to bring a bit of order. I removed a large branch about halfway up a few weeks ago. I am trying to leave a lot of the branches I remove so that I can leave some deadwood - without creating a deadwood monster - as the wild trees I see often have some dead branches on the way up and that is the effect I want. I want the right side a bit lower to separate the foliage pads a bit better so I may do a guy-wire to get it down.

Also going to need a new pot - something a bit bigger as its starting to look very unbalanced to my eye. Probably a similar Jixing - but a little bigger. The pot for the other one is more complicated. I seem to be doing some sort of a semi-cascade thing.

Thursday 6 June 2013

The local show circuit

Thought I would post some pictures from the local bonsai shows. To me local shows are North London / Hertfordshire and Buckinghamshire.

I really enjoy the shows - sadly my work commitments keep me out of any regular club meetings. I enjoy these meetings as they keep me grounded in the details and what is possible. I do hope to do some of the big European meetings late this year and next to help me aspire to more.

This set of images are some snaps of the Mid Herts Bonsai Club Annual Show.


Middlesex Bonsai Society Annual Show.


Digging the rosemary bonsai. Very nice.


Chiltern Bonsai Society Show.


That's all folks.