Sunday 28 December 2014

Ashridge Deer


Walking through the woods I came across a small herd of deer with a few stags and followed them for a while.

The trees are well established with very old birch and hawthorn stands.

Monday 15 September 2014

Scots pine starters - 2 years later


This is the end of the second year of growing these Scots pines from seedlings. They are a bit different to grow than other broad leaved species in that they seem a lot slower - taking a long time to grow roots and stabilise themselves in the pots. This is nice in that you can take your time to arrange the surface roots - unlike Oaks which would have massive tap roots circling the pot in 2 years.

These are the 2 prime pines - now planted over into the new air-pots. There is a 3rd one which is ok and will be used to experiment on other soil types and a 4th which will be a planted out in a quiet flower bed to retire.

I wire a big bend into the trunks to make them a bit more interesting - no s-bends just a single curve. This takes about 4 months to set - and by the end of the year the wire marks are not visible any more. The large one was too stiff to bend by the time I got around to it.

All of these pines that I am currently growing have a good selection of lower growth. I have removed the tightly clustered lower growth to avoid major trafic nodes and have a nice spread of shoots to choose from when i sacrifice the upper sections.

The largest is now 22mm thick and the rest are about 18mm. I believe that a good root colonisation is responsible for the enhanced growth of the big one. The fungi seem to prefer the clay pebbles to the coco media - so i may plant the last good pine in pebbles and see what it does.


The more vigorous one has quite a good colonisation of the roots by Mycorrhizal which probably explains why it's so much bigger than the other. I preserved all of the roots which were visibly colonised.

I was planning to move them over to colanders but discovered these air-pots which seem to be the ideal solution to the problem. I had thought that I was a genius for discovering them and using them with pines - but I know that several others have beaten me to it.


Here the same 2 pines are last year at about this time of year.

I potted them now in the late summer once the growing was over but the roots still active. They should settle in nicely over the next few months and then have a big start to the spring.

Here are the roots after 2 years in coco. Even at this stage it's still not too root bound - although this is probably the right time to move them up to a better pot. I didn't want to disturb the roots too much at this time of the year so I moved them over like this. The air-pot should clear up the few wrap around roots in there.


So after 2 years of trying the canna soils the coco coir media of the professional plus is the way to go for me.

These are planted again into the coco growing media with clay pebbles lining the bottom of the pots.


Wednesday 27 August 2014

Big pot Oak - another year


Since April 2003 I have been growing this Oak in a large pot. It's been a tough growing summer in sunny southern England. It's late summer for my large Oak and it's looking a bit untidy from all the mildew burns on the leaves. Even with careful watering I still had a lot of leaf burn on many other species - just cooked because it was too hot - no problems with nutrients or salts. About the only thing that doesn't seem to burn is the Oak. Due to the shortage of rainwater during the peak of the summer it got a lot of London tap water and this doesn't seem to have made any difference either.

This one has increased greatly in ramification this year. I've been using guy wires to keep the branches heading in more or less the right direction. I continue to shorten all the top growth and allow the lower branches to grow freely. The taper is quite nice now - and the thick side branches are enhancing the movement in the trunk.


Using the same matchbox again 12 months later you can see that the base of the trunk has expanded significantly - its approx 6cm now. And its a bit exciting to see that there may be some bark forming at the base too.

I imagine that I see some good radial surface roots forming around trunk as well.

I went to great expense (£3.95 ) and bought a soil pH checker. When I first checked the Oaks pot the pH was close to 4 - which can't be good even if the plant likes acidic conditions. I got some lime which is useful for increasing the pH and also adds calcium and magnesium to the soil. The soil is now a much friendlier 6.5 and I know that all the important macro-nutrients are in plentiful supply.


I'm find that every time I walk past it now I want to transfer it to a bonsai pot and start working on the twigs. I also know that I need to keep its roots under control and the longer it stays in this pot the more difficult it will be. Over the last 18 months it has increased in trunk diameter from 3cm to 6cm and its is tempting to let it expand another year and risk the root problems.

Its been interesting to learn that there are other bonsai growers out there going through this same process with Oaks. I hope to get to see how they have been going with their attempts.


Sunday 10 August 2014

Milk as a fungicide


A week ago I sprayed my Oak trees with a dilute solution ( about 1 : 8 ) of skim milk to try to treat the very heavy powdery mildew which had infected them all. It was killing off all the new growth coming through in the late summer.


After waiting a week to see what happened I had a look at my Oak leaves which were sprayed as an attempt to treat the heavy powdery mildew. I am so extremely surprised at how effective this has been. The underlying damage to the leaves is obviously still there - but the mildew is almost entirely gone.


This should extend my growing season a little and improve the vigour of the oaks greatly. 

This is a great treatment. I cant see any downsides.


Sunday 27 July 2014

Mid season leaf problems

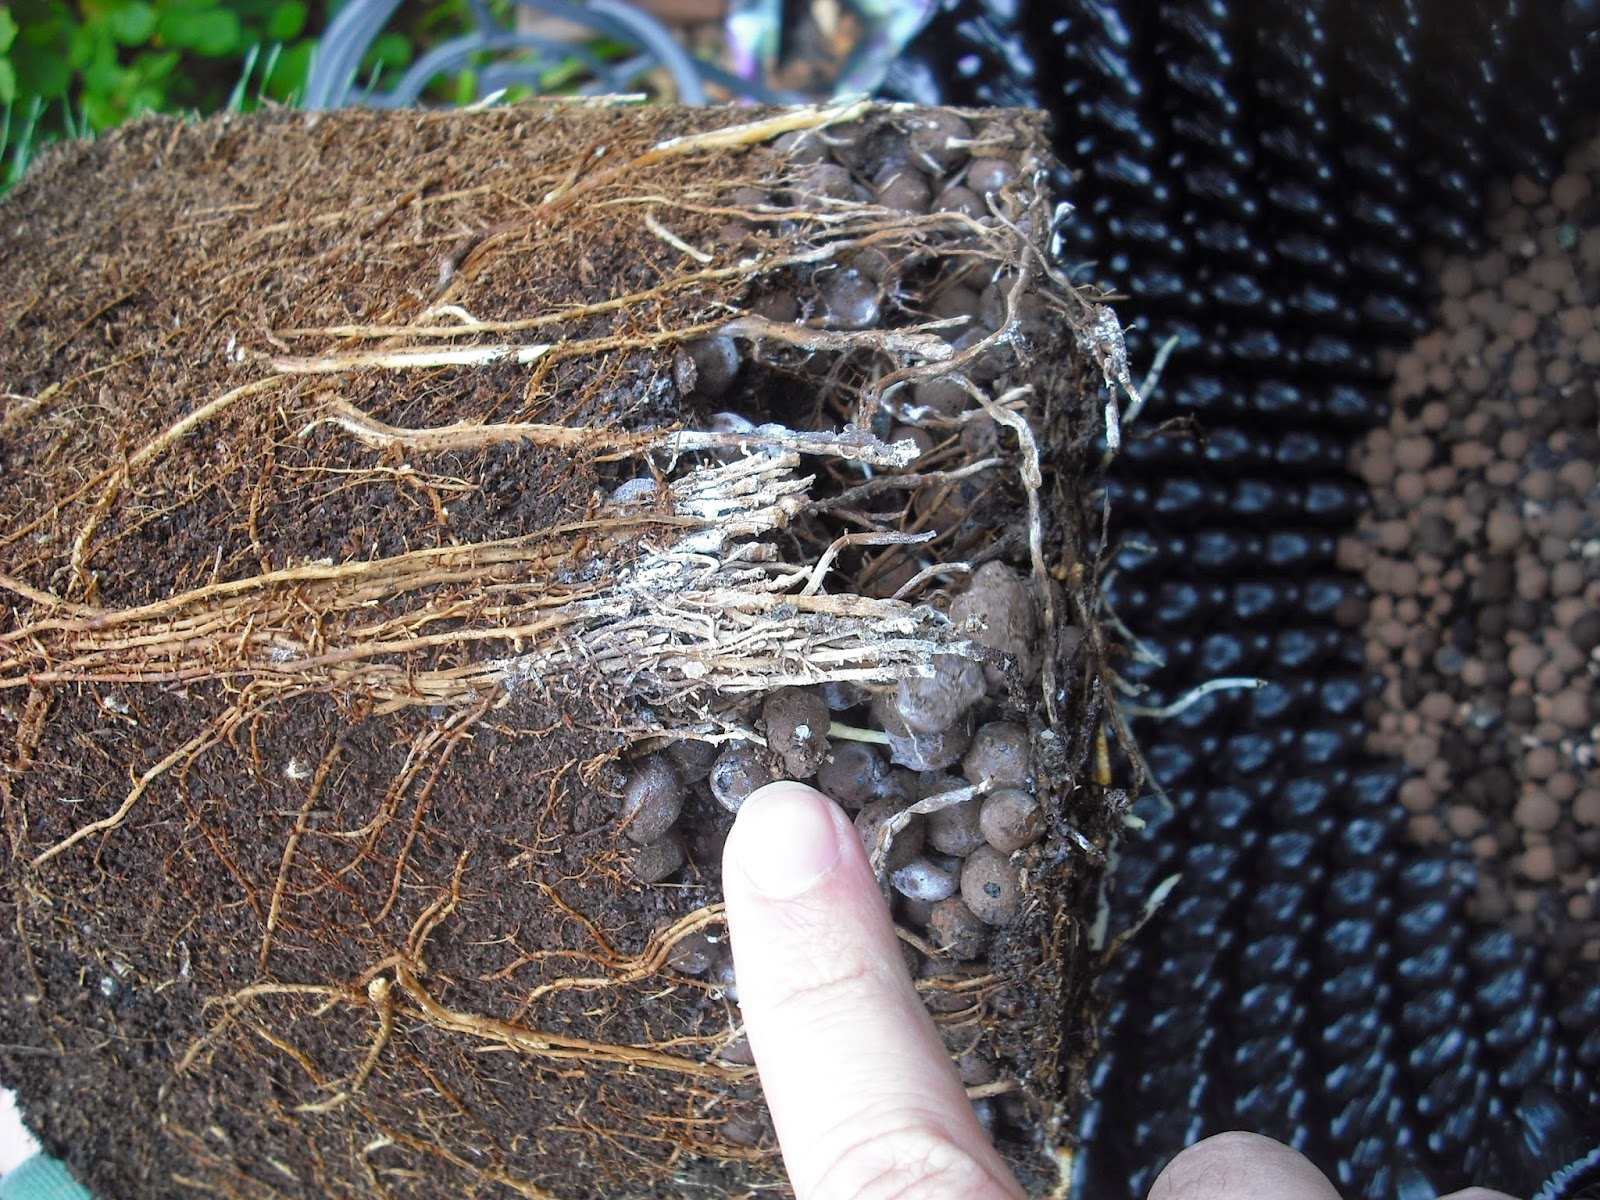
I have been growing various things (including bonsai) using Canna coco coir as a growing medium. It's nice in that over a year it doesn't change in volume. It seems to stay nice and airy around the roots too. The only problem with coco is that it can cause a shortage of calcium - hence the special coco orientated fertilisers. I didn't understand until I did some more research.

http://en.wikipedia.org/wiki/Coir


I started to see leaf curl on my habanero chilli plants - so I did some research. I bought some calcium nitrate fertiliser off Amazon. I added this to my organic fertiliser and I haven't had a curled leaf since. The vitality of the chilli plants has increased as well.

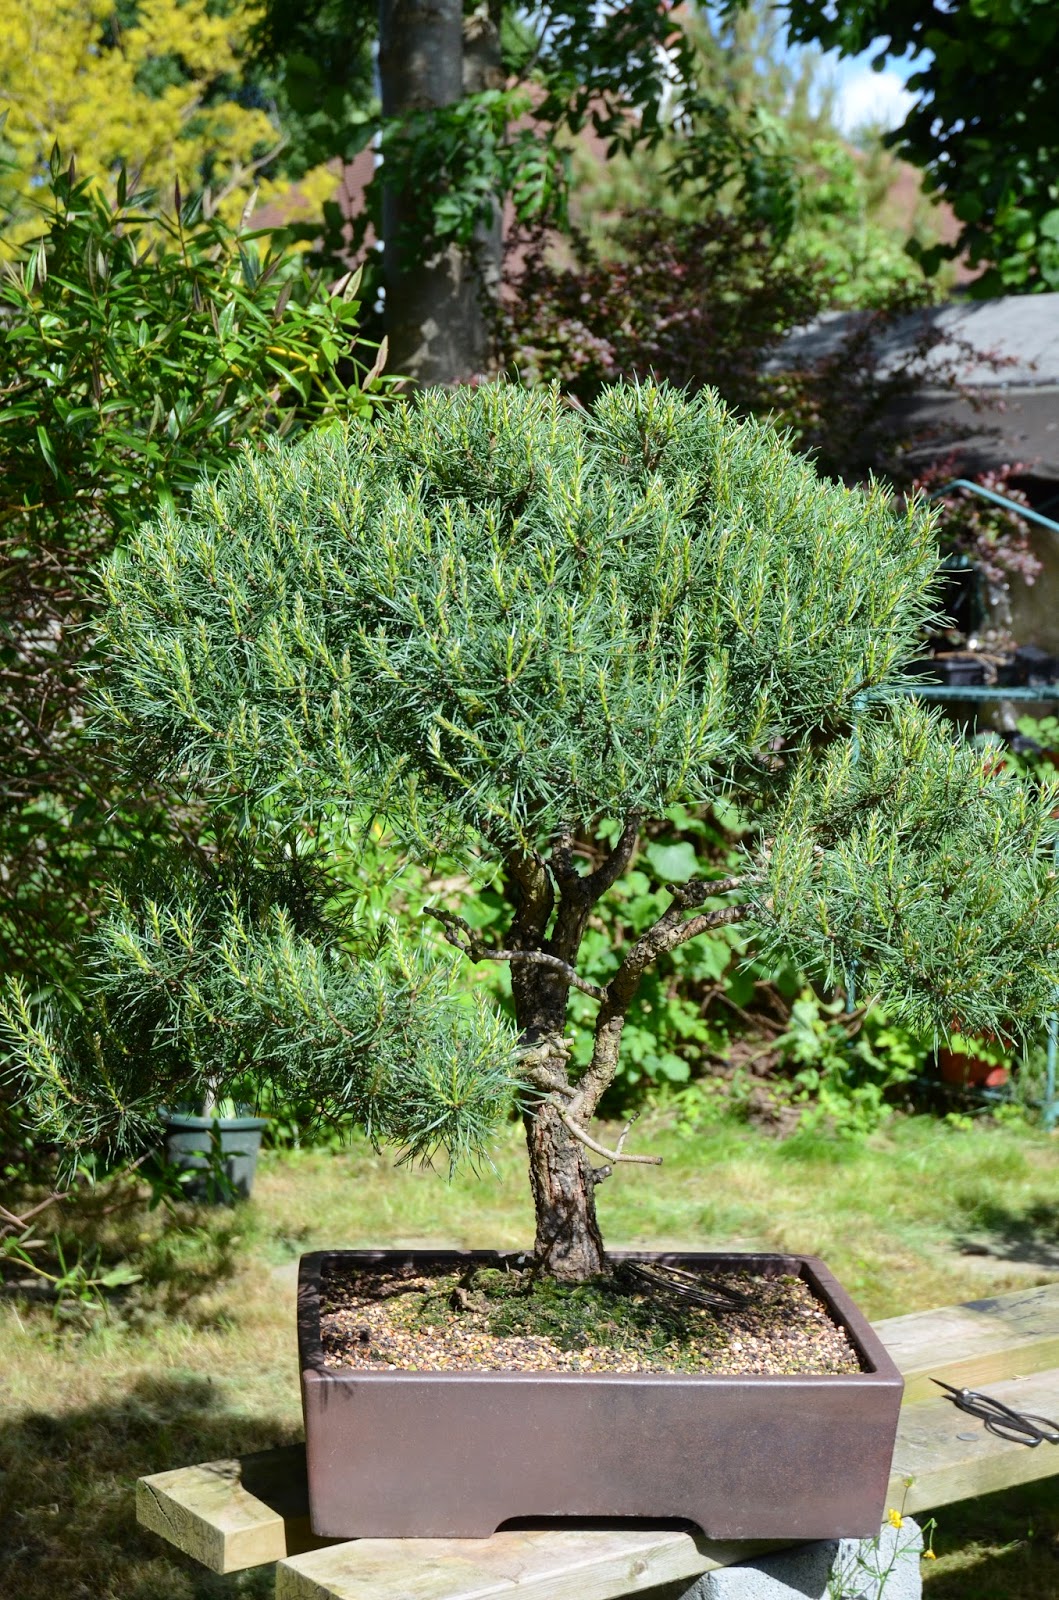
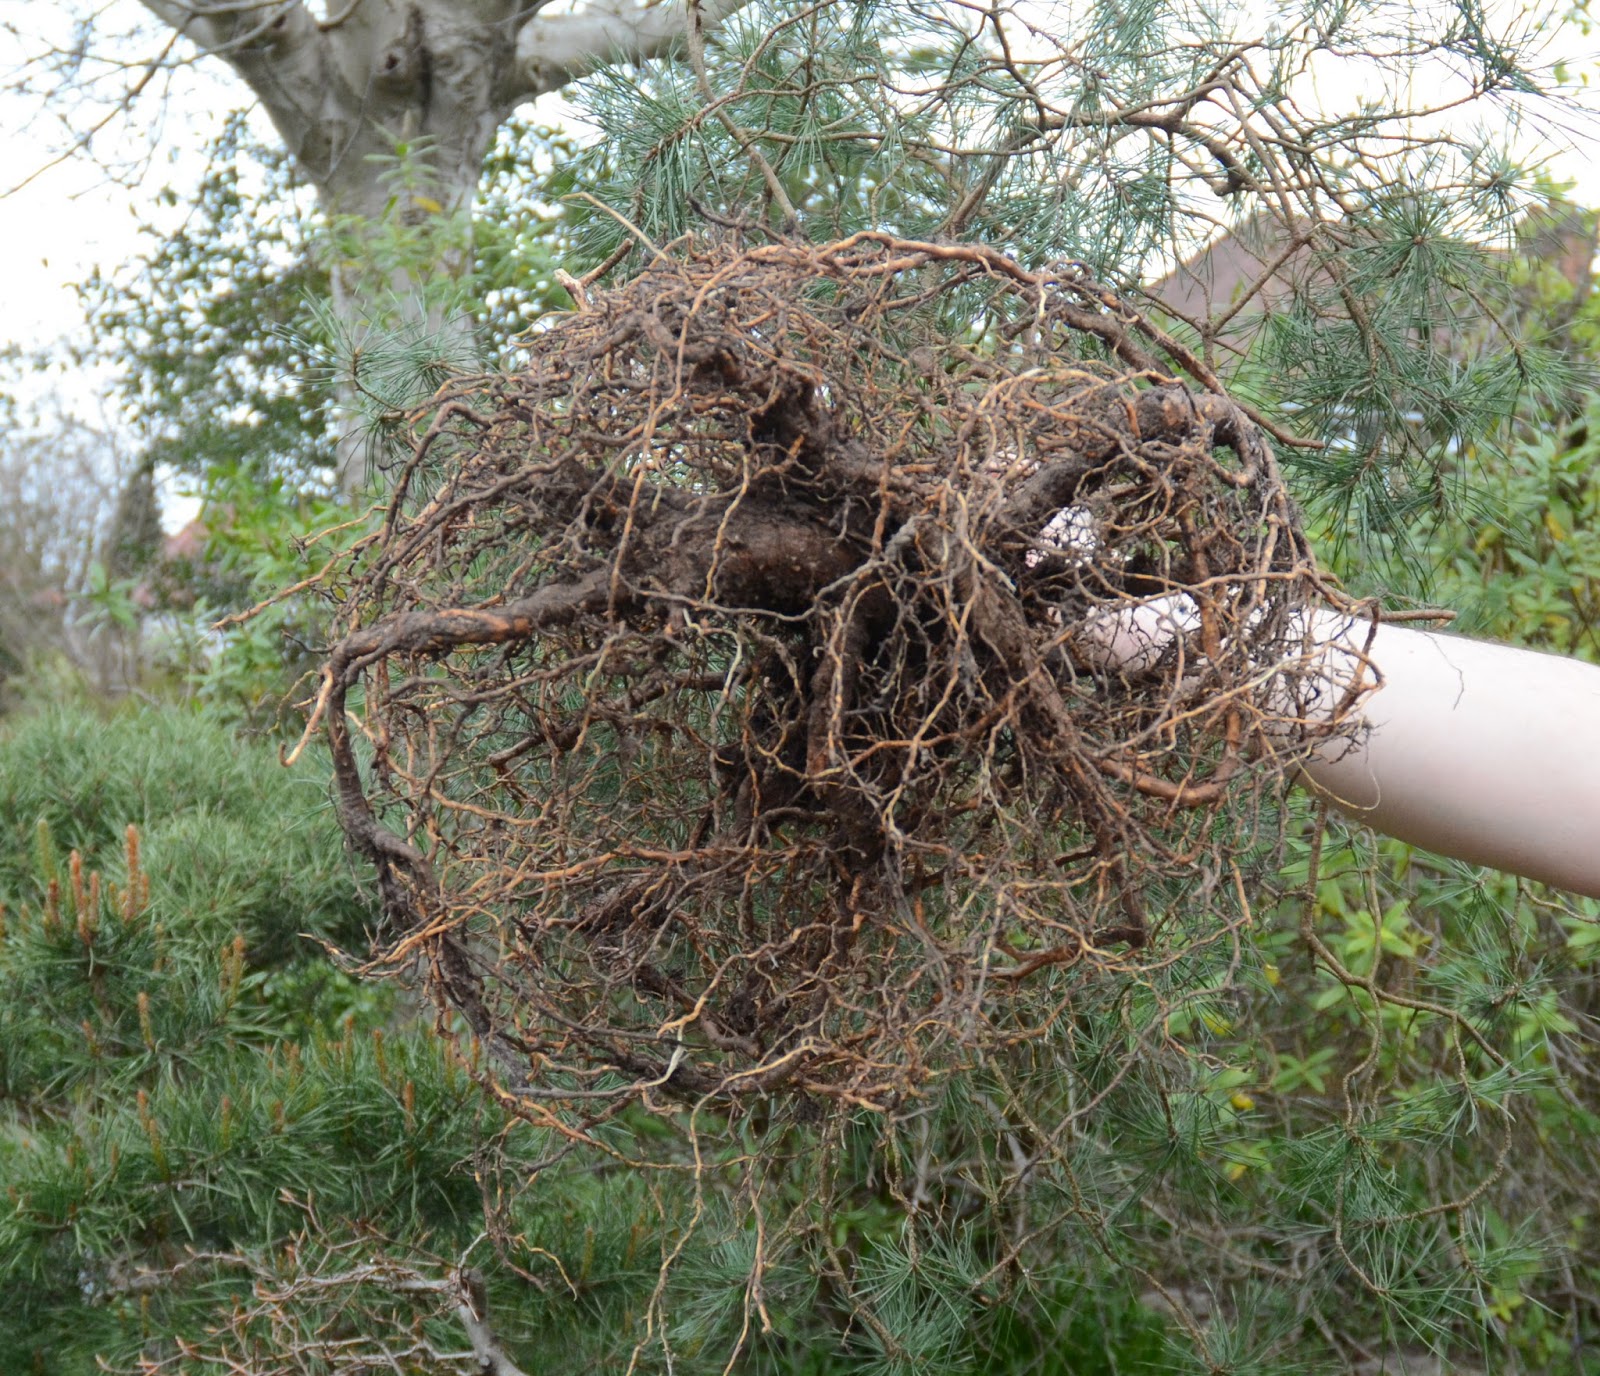
Now I am growing some Scots pines in this same growth medium so maybe they have the same nutrient issues? I gave them a dose and they seem to be a bit more perky.

I now understand why their nutrients come in 2 parts - the calcium and potassium form insoluble precipitants in the solution if they are too concentrated. So I know they are looking after the calcium issue. I am using the soft water version of the fertilisers - so I should be OK. But something still seems to be wrong.

The calcium nitrate has fixed my citrus up nicely - and my cherry no longer has lacy leaves on its second flush. I have a Pyrus pyraster (wild pear) which is also giving much better growth with this treatment. So far, so good.


In the summer when it's warm I use organic fertilisers and rainwater. This may be negating the effect of the specialised nutrients looking after the calcium issues with coco growing mediums.


My copper beechs have a lot of burning on the leaf edges. I'm unsure if it's salt or the hot weather? I am fairly certain that this isn't the calcium issue affected the fruiting/flowering trees in coco coir soils. These are in my experimental very large pots. I water these with tap water because I just don't have enough rain water to go around. The beechs in clay based substrate are much better off - but they tend to get the rain water by hand and not the garden hose.

I tested the pH in my rainwater butts and it was off the scale of my test kit - so well less than a pH of 6. I have bought some hydroponic pH stuff to take this up a little as it can affect the beech roots. I will also test the soil acidity to understand this problem better. I will aim for a pH of 6.0 - 6.5 as this gets rid of the aluminium toxicity problems.

This is really annoying as June/July are the months when the beech will give its peak growth.

In addition my poor oaks have terrible powdery mildew - it's really ruining second flush this summer. I have sprayed this with milk (diluted 1-10) and will report back on the success of this treatment method. I have ordered some systemic fungicide just in case - but I prefer the milk spray if it works.


I am wondering if my low fat milk works as well as full fat ?

Sunday 25 May 2014

Pine trimming


I've been nibbling away at my large pines over the last few weeks to keep the new growth in check. As you can see there were many candles that needed trimming. It's quite an even growth with no slow zones and no dominant apex - just good balanced growth.

I have taken off the very strong candles as they show up and left the little ones untouched. I'm not pinching but rather waiting until they are mostly extended and I can see the needles forming. This allows me to cut precisely and leave the number of needles I want in the area. I'm leaving 10 pairs mostly.

I am also trying to leave things a little untidy as I don't want it to look like topiary.


I am also undecided as to the front as there are several good angles. Initially I liked the left immediately above image on the left as the front - but the crown is too heavy for this. A little trimming may fix this - not something I want to do in a hurry though. Plenty of time to decide.


The medium pine is running a few weeks faster than the large one as usual even though they sit together on the bench outside in identical conditions. I have also only trimmed the dominant areas or candles to keep things balanced. I do need to do another round to get everything down to the desired length.

Both of these were repotted this year so I am going gently on them.


Tomorrow if I feel energetic I will do the final fine trim on this one for the season. I want to get it done early so I don't miss the timing for setting next years buds.


The entire apex has grown after I purchased the collected tree - and is now taking a lot of work to get under control - but I have the luxury of almost infinite density there now. Every single needle on the top has tried to shoot - so its been a lot of nibbling.

Also - neither of them contain any wire at the moment so that's all got to go in still. I think they will look quite good by the time it's all done.

It's been enjoyable getting to know these pines and seeing now differently two trees of the same species can behave under near identical conditions.

Monday 5 May 2014

Local Bluebells


The bluebells in the local Hertfordshire woodlands are looking very good at the moment. I took a walk out with my wife to admire them - and carried my camera along. I was rewarded with a few patches of strong direct sunlight through the forest canopy for some good pictures.


Well worth a walk in the afternoon to see.


Monday 21 April 2014

Scots pine starters


Last year I began an experiment of growing some of my own Scots pine material for bonsai at home. After 1 year of growing them the trunks are now 15mm thick and the roots are well established. The needle length has at least doubled.

After 1 year they are too stiff to bend so if you want movement on the trunks then they should be wired and shaped in the first year. I see everything over 20cm on these as sacrifice and want it to grow as quickly as possibly. One of the lower shoots will be trained as the actual trunk - I have plenty of choices there and I am in no rush.

The pots are standard hydroponic issue 6.5 litre pots. 

They took a long time to take root and be stable in their new pots due to the small cell root system they had when I got them. The wind was a real problem last year - they need to be sheltered and staked. Some had substantial disturbance of their roots by blowing over and having the pots falling over. All 4 are now free standing and stable through the winter outdoors.

I have tried a few different soils. So far the growth in coco coir is well ahead of any other growing media I have tried by a large margin. It will be interesting to try the old school colanders at some stage - next year I may move one over into a grow basket and see how it goes.

They went through most of the year on organic fertilisers. As the temperatures warm up they will go onto them again this year.

Where possible I try to use rain water on them - but quite often I am pressed for time so it's tap water. They don't seem to be bothered at all by the hard London tap water. I think Beech trees may not like the hard water much - something I am trying to understand.


They are of quite variable vigour. Some are extremely vigorous - especially the ones grown in the coco coir. This one seems to have budded from every bud on it from the ground up.

I am very pleased that none of my pines have any flowers this year. This means that they are not starving or stressed. So many Scots I see at bonsai shows are covered in flowers that it makes me doubt myself. Not sure how they deal with the bald patches.


On the apex I had so many large candles that I have already had to remove several - and more will need to be removed. I will work through each tree over the coming weeks and remove a lot of buds and candles as there are far too many at the moment. 


Here is how they started 1 year ago with a tiny cell grown root system.


Sunday 30 March 2014

Big pine repot


I decided to take the risk and repot the large field-grown Scots pine I bought last year as knew that it needed to have the old soil removed for it to really thrive. It has had a good year with plenty of food and water and was strong enough to deal with the trauma of the transplant.


I allowed the soil to dry for a few days as its much easier to remove than if it was wet and muddy. The tree and old soil was very heavy and hard to work on - leaving my hands covered in blisters - but it was the right moment for the work with the new growth just starting to swell. The big risk is that the trauma will loose me some of the top quality back budding that developed last year.


The old soil from field growing contained heavy gravel and some chunks of flint. There were large dry sections with no roots because the rocks and heavy soil made it hard for the water to penetrate the dry areas. I hope it won't be too upset with the bare root treatment - I have waited until the perfect moment to repot it and based on previous experience it will continue to grow as if nothing has happened. The improved breathing and watering around the roots should give a useful boost in vitality as the season progresses.


Once I had cleaned off all the old soil I could see that 2 major roots were growing upwards which couldn't be removed now. Once the rest of the root ball is mature enough they will be dealt with. The surface roots at the base of the trunk will then be quite good.


The clean root ball was still quite nice. I had spent a few hours cleaning out the old soil and trying to damage the roots as little as possible. I also didn't want to use water pressure to clean the roots as I wanted them to hang onto as much of their beneficial fungus as possible. I also added a few sections of old roots to the bottom of the new pot to help the fungii even further.


I took a chunk off the bottom of the lowest taproot to seat the rootball deeper into the pot. Once it was positioned I began gently filling and working into the gaps making sure there were no air gaps under the base. I added further soil in by layers and worked it carefully around the roots. Filling the pot in one giant pour and then poking it frantically with chopsticks ends up traumatising the poor roots.

The large training pot is from Kaizen - and the soil is all the usual stuff. The draining layer is large Canna clay pebbles. Then its supalite and pinebark with a bit of fine biosorb.


Some of the roots above the soil level will be trimmed off in 2 years time once the roots below soil level have caught up.


A few big chunks of root removed were removed - none close to the trunk - all from the ends of the roots where they had formed heavy nodes at the edge of the pot.


I lowered the soil level around the base of the trunk in preparation for the next repot in 2 years time. I intend to lower the soil level by about 1 inch at that time to bring the whole pot down to the level that the soil is against the trunk.

The tree was then watered heavily to clear out the dust and settle it all in. As per usual I watered with canna rhizotonic and light organic fertiliser to help the roots recover. I will be watching anxiously over the coming weeks to see that it recovers.


Monday 24 March 2014

Maple repotting recovery time

This post is a note to myself - and those who are interested - on how long it takes a maple to recover after root pruning and repotting. Many new bonsai growers have wondered how long it takes when they do their first repot - so here is what I've observed this year.

On the 18th of Jan this year I repotted one of my larger maples - it has now settled into its new pot and is doing well. The first flush of growth has hardened off and I've done some light cutting back. There is some second flush growth coming through now as some of the shaded inner buds are opening.


By the 28 Feb the new roots were visible on the surface around the trimmed-back root ball. (5-6 weeks)


By the 22nd of March I have visible surface roots in all corners of the pot. The soil height is rising as well with all the activity going on underneath. The average growth on the new branches is about 40cm. I have trimmed this back around the apex where I don't want this much vigour and left it on the lower branches where I want to thicken up and add ramification. ( 8-9 weeks )


Immediately after repotting the maples were given root growth stimulant and mild fertiliser. After 2 weeks they were on normal strength regular fertiliser. I watered and fertilised based on the colour of the surface of  soil.


Thursday 6 March 2014

Scots pine potting problems


I had to remove my pine from its pot rather brutally. Very annoyed to lose a pot - but I really didn't have much choice.

While a baked clay substrate that doesn't break down is very nice, it also doesn't compress, so if you have any reverse taper (or a large inner lip) on your pots it can be difficult to repot a tree after a few years.

I did spend quite a bit of time trying to get it out and eventually gave up and used the hammer. A light tap eventually got it out.

The straight line on the pottery shard illustrates the inner curvature of the pot. I do check all the new pots I buy now to make sure that there will be no difficulties getting the bonsai out of them.


In the end the roots were fine - and that's what counts.

Sunday 16 February 2014

Saturday 25 January 2014

Maple progression over 6 years

I was running through some archives of images off an old camera and I got these together of this maple I've been growing for the last few years.


2014 - Focus on the side branches has improved the shape and give more fine branches. The inter-node length is also much improving now. My maple ( and general ) pruning and technique is also much improved.


2012 -  Ice cream cone shaped. Target height achieved so its time to focus on the side branches now. and develop more fine ramification.


2011 - Growing happily. Full of wires and weights to move the fine branches.


2010 - great colour on the autumn leaves. Bigger pot.


2009 - Trunks held apart with trimmed lengths of chopsticks. I got over enthusiastic and defoliated - would have been better off selectively trimming.


2008 - First trunk chop. Needed to be done early to have any chance of taper. At this point i had had this maple for about 2 years.